Girltopia Fun
My older girls were working toward their Gold Award and had to complete the Girltopia Journey as one of the steps to earn it. We had a campout just for them to help work on it, but we decided all work and no play makes our scouts very cranky.
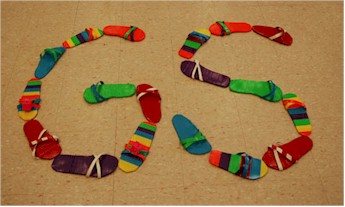
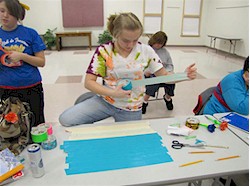 We added a duct tape adventure to the plan and the girls loved it and keep asking for us to do it again. The girls made flower pens, beach type bag, flip-flops and a couple designed something on their own.
From this event the girls ended up loving what they were doing so much they decided as a group to use this for their creative project in the Girl Scout Girltopia Journey. The girls ended using the duct tape flower pen as part of their inspiration part of their Girl Scout journey; they made 100 of the flower pens adding a inspiration message to each one and donated them to a local nursing home.
DUCT TAPE FLOWER PENS
The girl used colorful duct tape, pens, and they tore the tape, but scissors could be used.
The girls took one piece of duct tape 2 inches shorter than their pen; they also tore two pieces about one inch wide.
The girls took the 1inch wide pieces and put on both ends of the pen. On the end they wrote with they had to wrap it around a few times to secure it. They got as close to the tip as they could.
The next step they did was to take the larger piece and wrapped the pen.

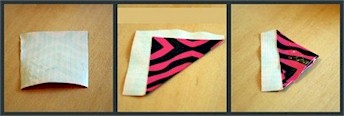
The next part the girls did was to make the petals. The girls tore 2inch pieces of duct tape, the girls folded the right corner up towards the top of the piece, leaving a little bit of the sticky side of tape showing, depending on size of flower the girls wanted was the amount they used.
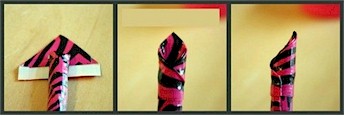
Girls started wrapping the petals to create the flower
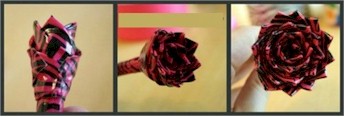
The girls had to keep the petals close together, where one point ended another one began. They spread the petals out a bit as the flower got bigger, but they didn’t do it too far because the flower would of gotten sloppy looking.
The girls kept the petals on the flower even, if you raise the petals up instead of keeping them even the flower looked like a funnel, one of our girls had to redo because of this.
The girls kept wrapping until they got the size of flower they wanted. Some of the girls mix there colors, they were very pretty.
CREATING FLIP-FLOPS WITH DUCK TAPE
We used thin foam, duct tape Scissors, and sharpie markers.
The girls traced around a pair of shoes with marker on a flat piece of foam,
Then they cut out the shapes and also same out of the foam.
The girls started wrapping strips of duct tape around the foam until the front was covered. You will cover the bottom later.
The girls turned the flip flop over and placed their foot on back and made a dot with a marker between their big toe (where the strap would go)
The girls took their scissors and poked a hole through the foam at the pen mark. We poked through the back and then went through the front to push the fray back through the hole.
The next step the girls did, the color of their choice for their straps (12-14 inches).
They folded them in half and folded the remaining sticky part over the other section.
The girls folded the strip in half (seams were on the outside) and they stuck the ends through the bottom of the flip-flop, they kept about ½” to 1” strip in the back.
The girls taped the back down with a piece of duct tape. They then flipped the flip-flop over and put their foot on it to position the top strip/straps, they adjusted them to their feet and they had to hold in place.
The next thing the girls did was to tape the strips/straps down on the back; this is where the girls finished the back of the flip flop with the matching duct tape.
The last few things the girls did to finish up was they took a small strip and cut in half. They wrapped this piece around the base of the strap. (where the strap met their toes)
They covered the entire back again with the duct tape, for strength.



Leave a Reply